[Note: This was first published as a Facebook Note on January 29, 2016. I am making it available here to add to the Inkscape pattern tutorials.]
 This is based on a tutorial for making hexagonal tiles for David White’s “The Battle for Wesnoth”, but you can skip the 72×72-pixel requirement. You can make your base hexagon in any size that looks good at 100% zoom. First, make a hexagon using the “Create stars and polygons” tool. Press the CTRL key while you’re dragging the cursor to make a proportioned hexagon like this:
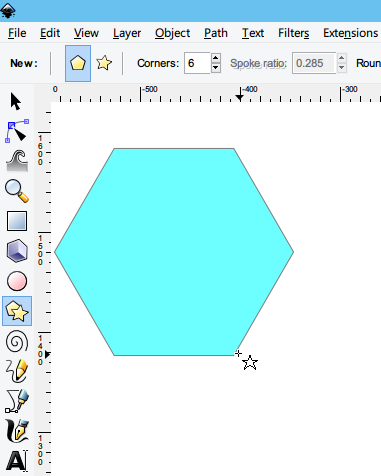
You may have to move the cursor around to have the hexagon lie on its side. Next, with the hexagon selected, remove the outline by holding SHIFT and left-clicking the ‘X’ swatch in the color palette:
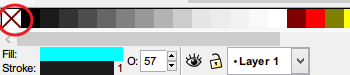
Replace the hexagon’s color with what you want by left-clicking the color swatches in the color palette – almost black, in this case: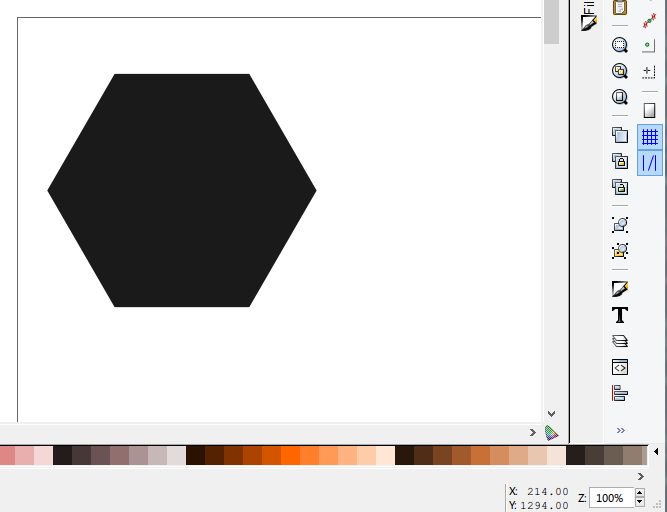
Next, add your main decoration. I just dropped-in a dragon I found at Wikimedia Commons: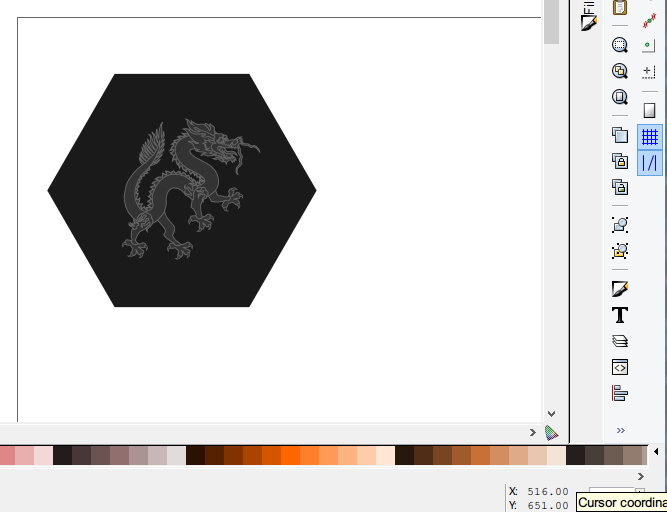
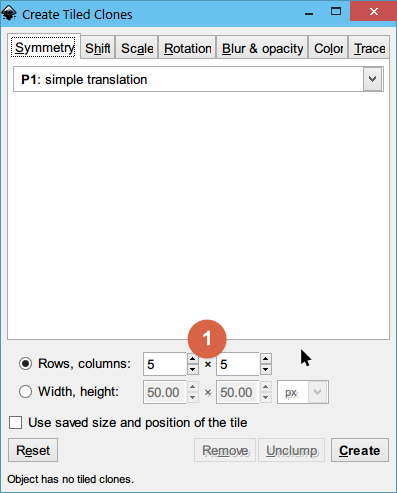
Group the hexagon and the object (select the two and do CTRL+G), and now you’re ready to create the tiled clones. With the hexagon group selected, go to Edit > Clone > Create tiled clones. First, on the Symmetry tab, specify how many rows and columns you will need (I just hit 5 rows × 5 columns).
On the Shift tab, have the “Per column” shift at x = -25% and y = -50%. Hit “Create”.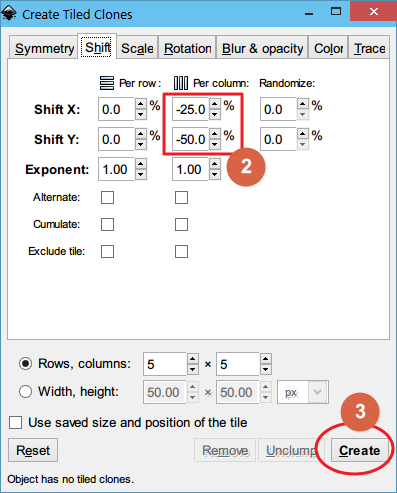
This results in nice, tiled clones covering the original group. Since we still have to edit the original group, select it (locate the original by clicking on any clone tile and doing SHIFT+D), and move the original group out of the way (you can use the arrow keys for this):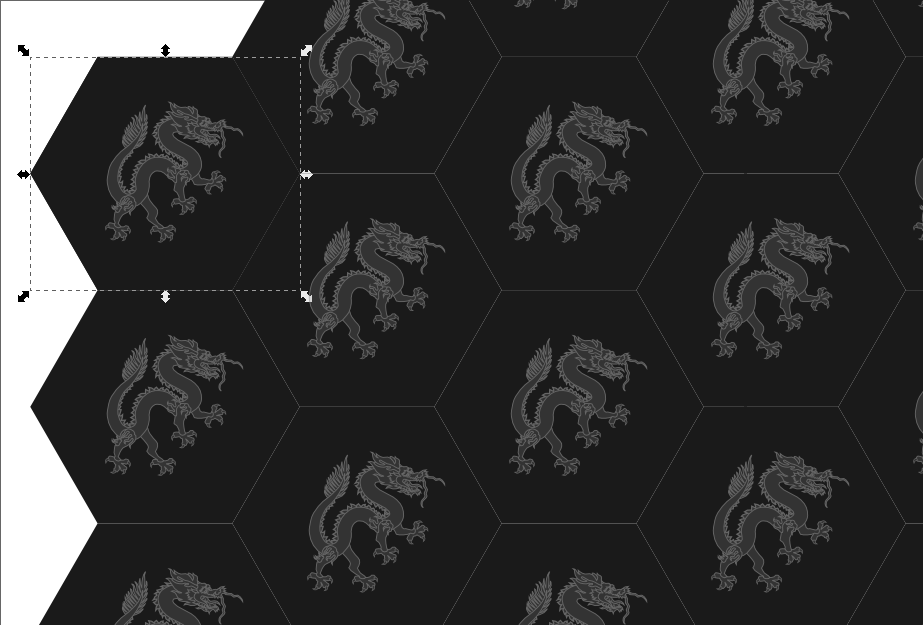
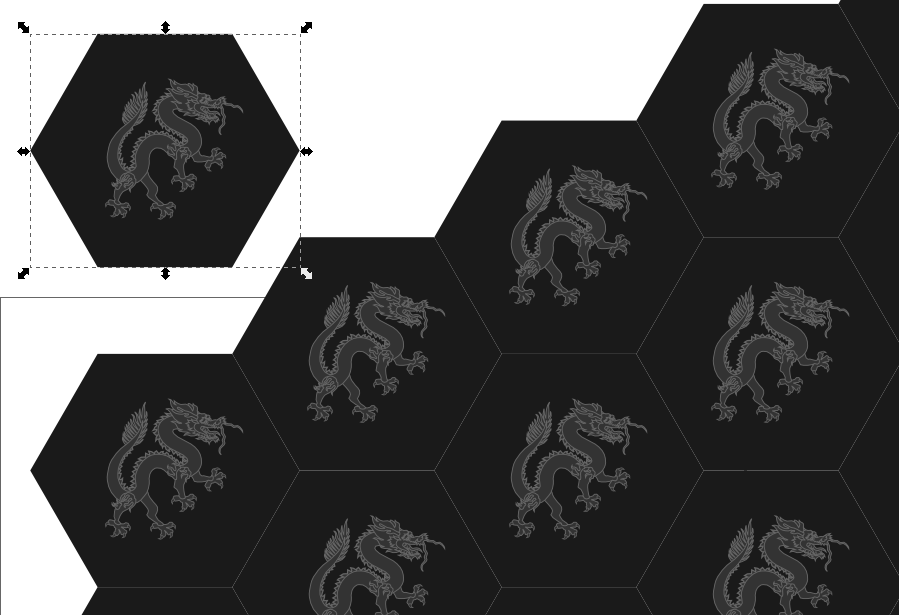
Notice there’s a 1-pixel gap between tiles. We remedy that by going into the group (right click group then click “Enter group”), selecting the hexagon, clicking the eyedropper button then doing SHIFT+Left Click on the middle of the hexagon.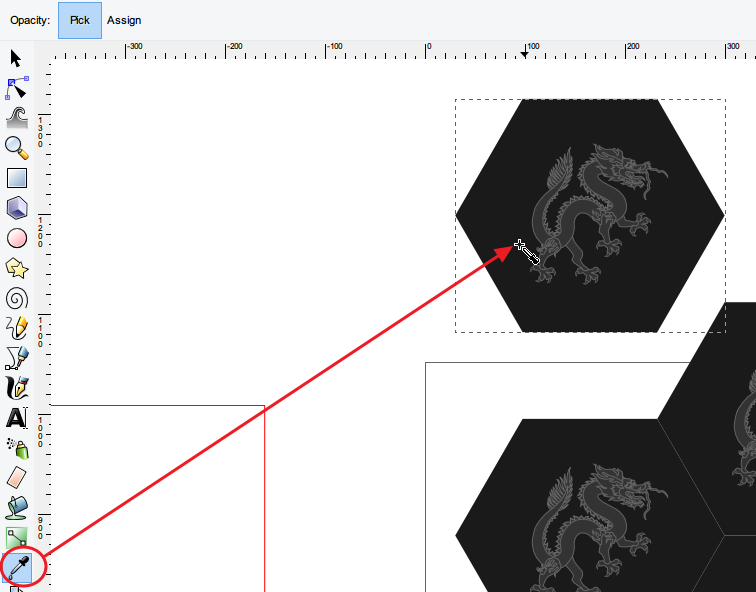
This creates a 1-pixel (by default) outline (same color as the hexagon’s fill) around the hexagon, removing the honeycomb effect: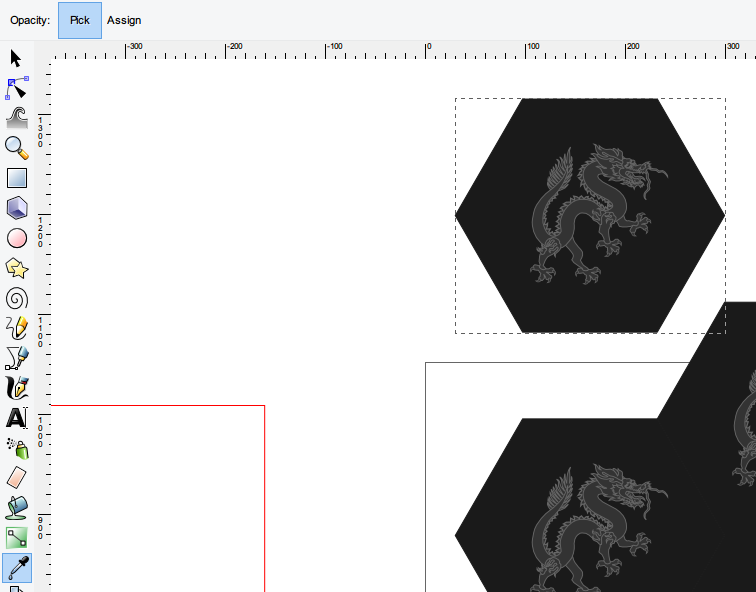
Next, add in an accent element. Chinese dragons are often portrayed chasing a flaming ball in the clouds. I used a Chinese ornament (which remarkably combines clouds in a ball shape) I found at HereIsFree.com (I autotraced and recolored it in Inkscape):

Add this traced element by entering the group then pasting and positioning it along any of three sides: North, NorthWest and SouthWest.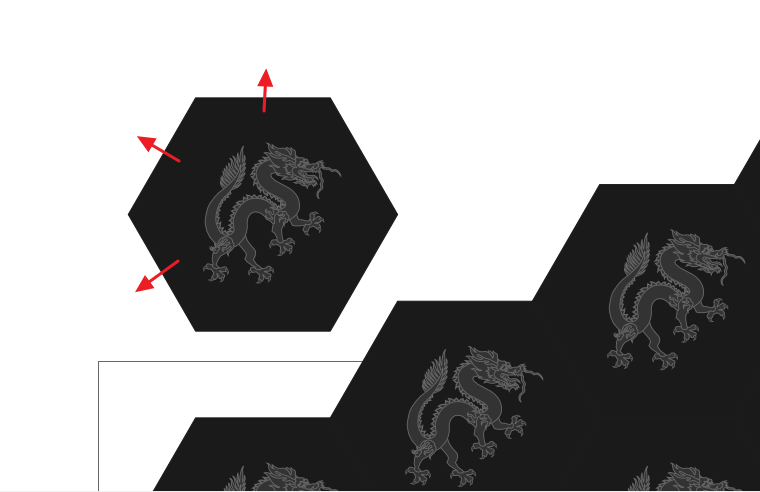
Because of the z-order of the clones, any element placed along these three sides will appear to be repeated in the opposite sides of the hexagon, in the cloned tiles: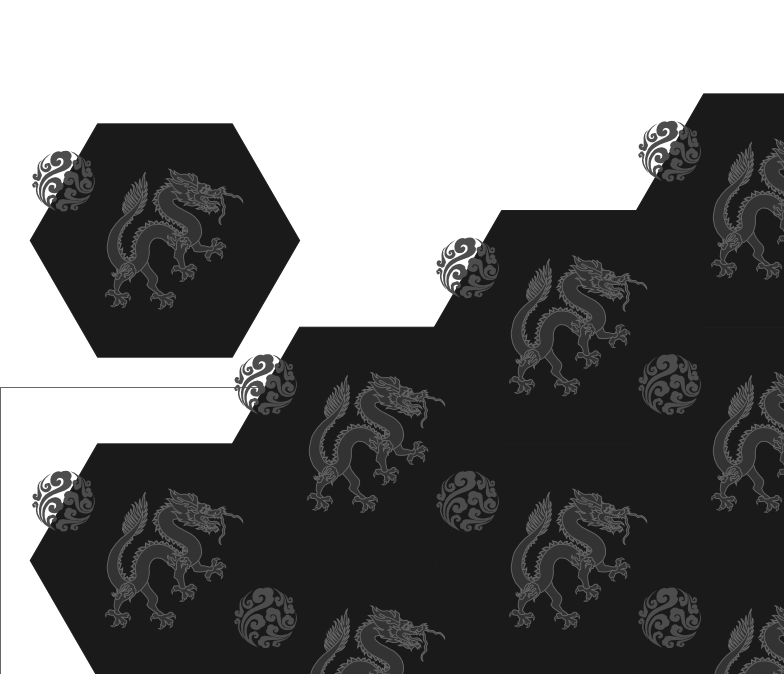
The last step is to create the actual rectangular tile for export: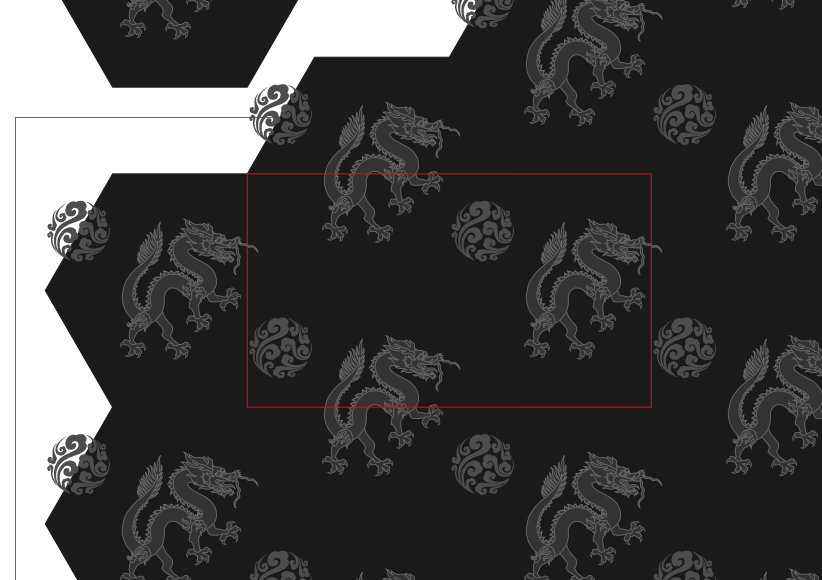
I removed the fill on this rectangle – we won’t be needing fills or strokes when exporting the tile. Notice how the rectangle’s corners touch the corners of the hexagon (you may move the rectangle in any suitable place over the clones afterwards):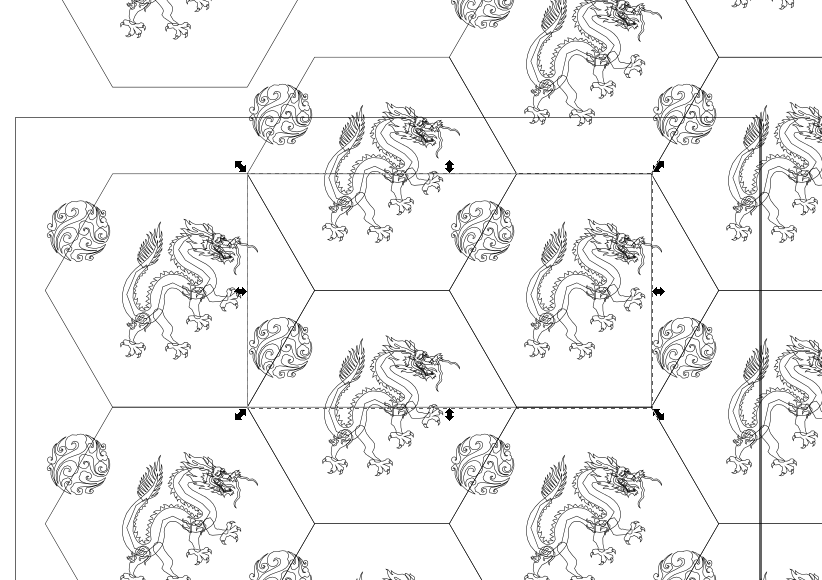
I used the pen tool (SHIFT+F6) in creating the rectangle, snapping to object nodes: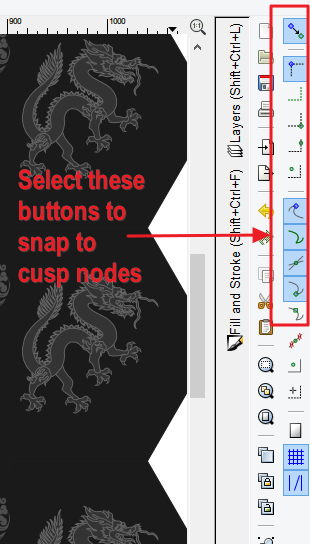
Remove the stroke/outline of the rectangle before exporting as PNG: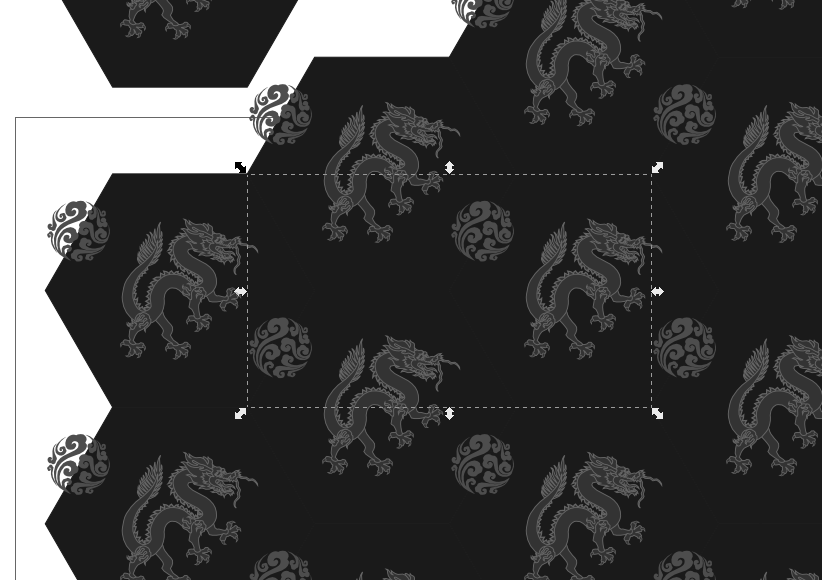
Export the invisible rectangle (if you accidentally deselected it, it is still there – just left drag cursor over the area to catch it):
What happens is that, instead of exporting only an invisible rectangle, this process also exports the visible area under the rectangle. You can then use the resulting tile as a repeating background in programs that accept PNG (or you can convert it to JPEG, etc):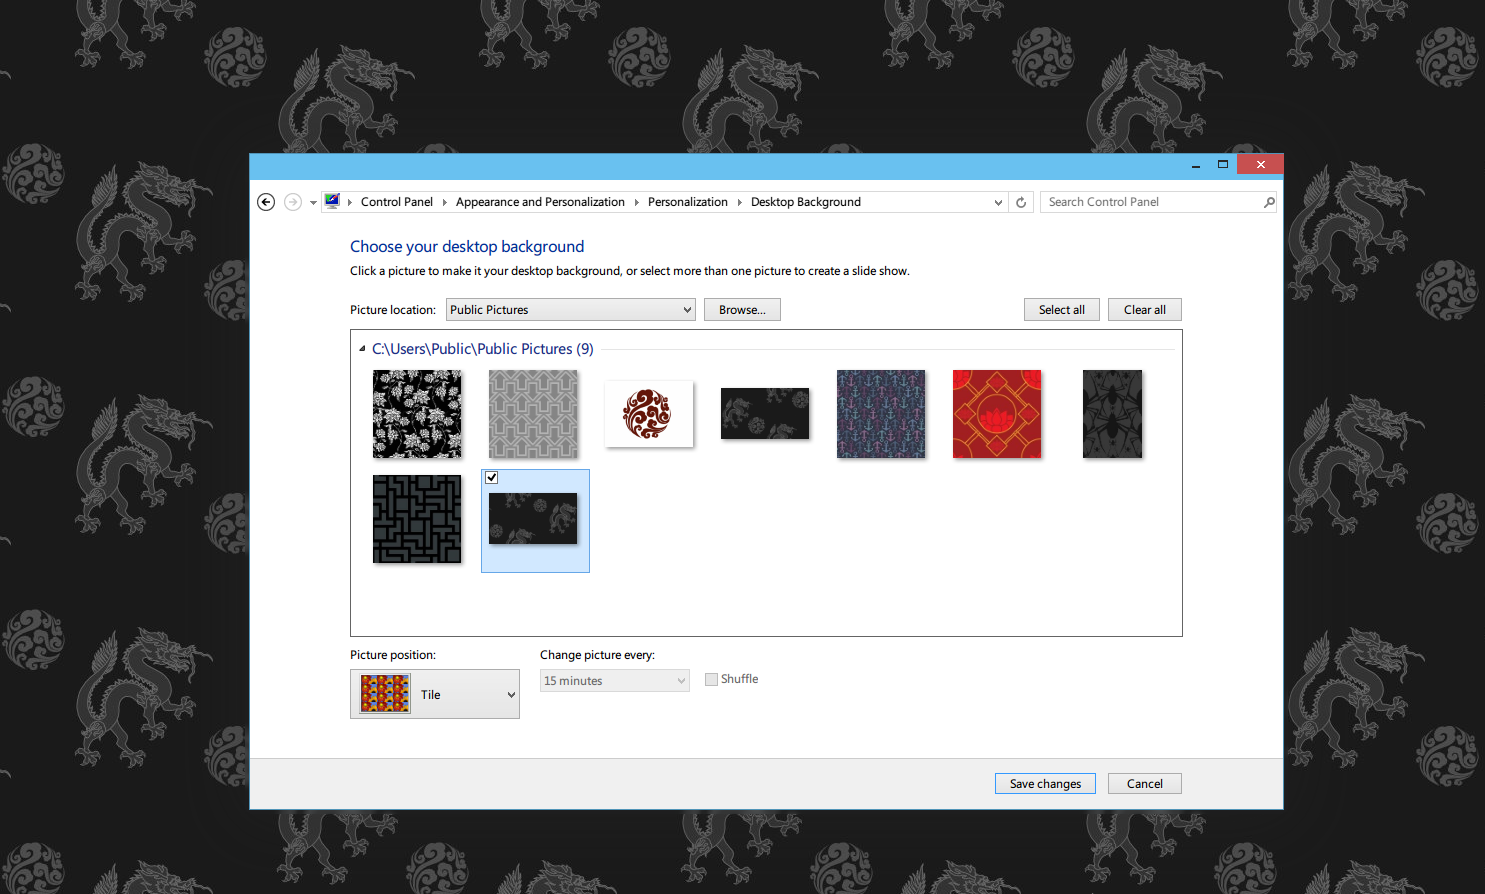
 ###
###
You may have to move the cursor around to have the hexagon lie on its side. Next, with the hexagon selected, remove the outline by holding SHIFT and left-clicking the ‘X’ swatch in the color palette:
Replace the hexagon’s color with what you want by left-clicking the color swatches in the color palette – almost black, in this case:
Next, add your main decoration. I just dropped-in a dragon I found at Wikimedia Commons:
Group the hexagon and the object (select the two and do CTRL+G), and now you’re ready to create the tiled clones. With the hexagon group selected, go to Edit > Clone > Create tiled clones. First, on the Symmetry tab, specify how many rows and columns you will need (I just hit 5 rows × 5 columns).
On the Shift tab, have the “Per column” shift at x = -25% and y = -50%. Hit “Create”.
This results in nice, tiled clones covering the original group. Since we still have to edit the original group, select it (locate the original by clicking on any clone tile and doing SHIFT+D), and move the original group out of the way (you can use the arrow keys for this):
Notice there’s a 1-pixel gap between tiles. We remedy that by going into the group (right click group then click “Enter group”), selecting the hexagon, clicking the eyedropper button then doing SHIFT+Left Click on the middle of the hexagon.
This creates a 1-pixel (by default) outline (same color as the hexagon’s fill) around the hexagon, removing the honeycomb effect:
Next, add in an accent element. Chinese dragons are often portrayed chasing a flaming ball in the clouds. I used a Chinese ornament (which remarkably combines clouds in a ball shape) I found at HereIsFree.com (I autotraced and recolored it in Inkscape):
Add this traced element by entering the group then pasting and positioning it along any of three sides: North, NorthWest and SouthWest.
Because of the z-order of the clones, any element placed along these three sides will appear to be repeated in the opposite sides of the hexagon, in the cloned tiles:
The last step is to create the actual rectangular tile for export:
I removed the fill on this rectangle – we won’t be needing fills or strokes when exporting the tile. Notice how the rectangle’s corners touch the corners of the hexagon (you may move the rectangle in any suitable place over the clones afterwards):
I used the pen tool (SHIFT+F6) in creating the rectangle, snapping to object nodes:
Remove the stroke/outline of the rectangle before exporting as PNG:
Export the invisible rectangle (if you accidentally deselected it, it is still there – just left drag cursor over the area to catch it):
What happens is that, instead of exporting only an invisible rectangle, this process also exports the visible area under the rectangle. You can then use the resulting tile as a repeating background in programs that accept PNG (or you can convert it to JPEG, etc):
Comments
The BestPest Control Service in delhi